Focus stacking for sharper images
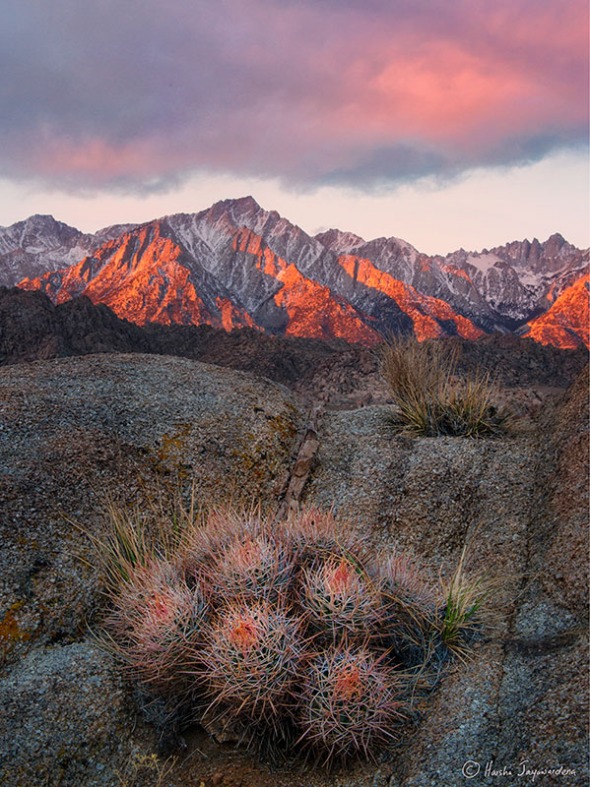
Alabama Hills, Lone Pine, California
D800, F22, 1/4 second, ISO 400, 38mm(24-70/F2.8)
Depth of focus increases when a smaller aperture is used. However this comes at a price. Certain amount of light get dispersed when the light hits the edge of the lens aperture blade when passing through it. The light dispersion cause softness and this is called diffraction. Less light get diffracted when the aperture is larger. The diffraction limit of the lens is the aperture at which the diffraction is noticeable.
Another factor affecting the diffraction is the pixel size of the sensor. Diffraction limit sets in sooner with a smaller pixel size. A crop APC sensor( which has smaller pixels) will reach the diffraction limit before a full frame sensor with larger pixels.
Cambridge in Color has a nice article explaining this http://www.cambridgeincolour.com/tutorials/diffraction-photography.htm
There are many calculators that are available online to find out the diffraction limit of your camera/lens combo.
Landscape photographers want highly detailed sharp images with everything in focus. The best way to achieved this is by focus stacking. The lens is sharpest when it is stopped down one or two stops from its widest aperture. If you have a 16-35/F4 lens like I do, the sharpest images are produced when the aperture is set between 5.6 and F8. Beyond that the image can get soft due to diffraction. Focus stacking is the technique where multiple images are taken at different focus points from near to far and combining them later. This can be done in Photoshop or using a specialized program called helicon focus. http://www.heliconsoft.com/heliconfocus.html
Another way to achieve this is to use a tilt/shift lens.
The image above was taken in Alabama Hills near Lone Pine, California. That day I was staying near Bishop and planning to shoot the sunrise at Mono Lake which is nearly an hour north. The weather that morning brought high winds and snow to the higher elevations making the drive to mono lake unsafe. We quickly changed plans and headed to Lone Pine. This gave us very little time to find an interesting scene for the sunrise. When I found this particular rock with the cactus in the foreground, the best of the sunrise was in full swing. I did not have time to focus stack the scene. Instead I decided to use a smaller F stop to get both foreground and the distant mountain in focus. The focus point was set just beyond the cactus. At 100% magnification the background mountain range appears slightly soft but I can still print this big without any problems as long as viewing is done at a normal distance.
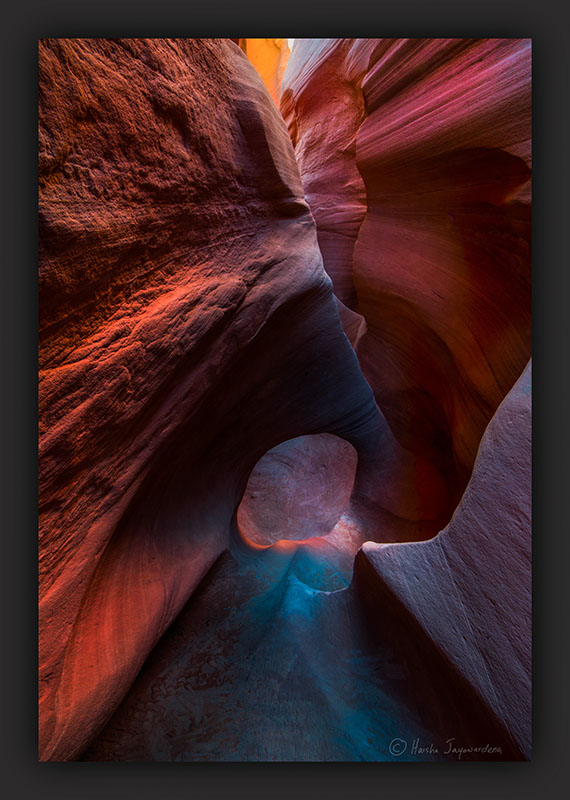
This next image is taken in Escalante wilderness in Utah. This particular slot canyon is appropriately named spooky. Part of the passageway leading to the arch narrows down to about 10″. Not a good place if you are claustrophobic . I had to walk sideways to squeeze through the narrowest areas. Setting up the tripod was a challenge due to narrow confines and uneven surface. The nearest sands stone wall was only inches from the camera while the arch with light filtering through was several feet away. This was a perfect scene for focus stacking. Once I was happy with the composition I turned the camera to manual mode. . The angle of the camera was such that I could not comfortably use the camera live view for focusing. Instead I used the focus ring. The nearest wall was a foot away so I turned the focus ring to 1 foot mark. This was repeated several times to get at least 4 different focal points from near to far. No exposure bracketing was done. How many focus points to take depends on several factors.
1. Aperture. Smaller the aperture, larger the dof. If you decided on a larger aperture you may need several shots with different focal points.
2. Lens. Wide angle lens have incredible DOF. My 14mm lens on a full frame camera has a wide dof. If the closest subject is more than 3 feet away most of the scene is going to be in focus. In that situation I can choose to shoot at infinity and take one shot. The opposite is true with longer focal lengths. DOF calculator on a smart phone can be very helpful.
3. DOF on a full frame sensor is shallower than a crop sensor
Once you got the shots you can use several programs to blend them together or do it manually. PS does a very good job of doing this for you.
This is how you do this in PS
1. You need to get the images as layers into PS. If you’re a LR user select the images you want to stack and right-click them. In the floating menu click on edit in and choose open as layers in PS
2. Next you need to auto align the images. Once you have all your images as layers in PS, click on the top layer and then Shift-click on the bottom layer to select all the layers in the stack. Then go to edit and select auto align layers. Select auto and click OK
3. Next you need to auto blend these layers. Make sure you still have all the layers selected. Go to edit and then select auto blend layers. Then select Stack Images and make sure Seamless Tones and Colors is checked. Click OK.
4. Now you are done. Enlarge the image 100% and check carefully for any errors. Then process the image as usual.