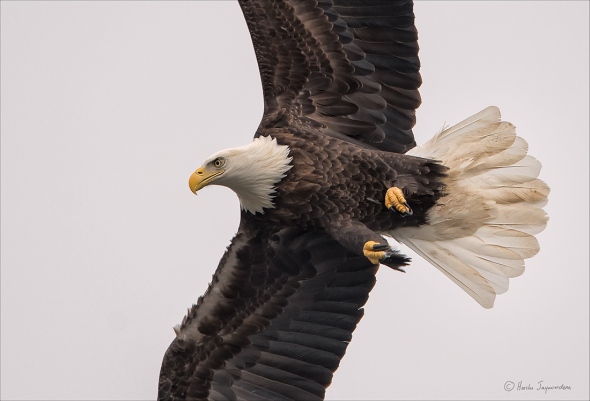
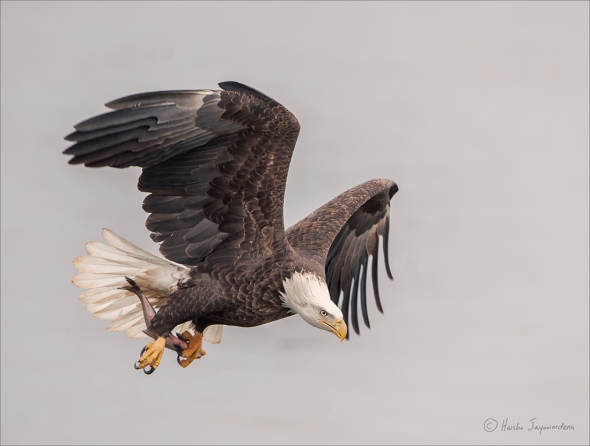
Photographing Bald Eagles, Lock and Dam 14, Mississippi River 2013

Each January I look forward to visiting Lock and Dam 14 on the Mississippi river in Le Clair, Iowa. Eagle numbers peak during the second and third week of January. Last year was a complete flop. Warm weather and a plummeting shag population kept the eagles away from this particular dam. Lock and Dam 14 does not usually have the biggest concentration of eagles. However it is the best place to take pictures of fishing bald eagles.
Please read my blog post from last year here. https://harshajphotos.wordpress.com/2011/02/
More Eagle pictures can be seen here http://harshaj.smugmug.com/Nature/Birds/Bald-eagles/15175398_pPp34b#!i=1194847071&k=7qLHC89
Arieal view of LD 14
During the eagle season the platform can get very crowded and so if you are planning a visit try to get there early. The best time of the day is between 11AM to 4.30 PM. Foggy mornings can offer interesting creative opportunities. After 4PM the sun goes down behind the tree line and the river is in the shade. Photography can be OK all day on cloudy overcast conditions. Sunny early afternoon with southwest wind is an ideal day for eagle photography.
I have listed a few suggestions below that may be helpful:
1. Eagle activity is sporadic and you may be standing there for several hours in subzero temperatures. Dress warm. Wear layers. My toes tend to get very cold . I wear a sock liner, woollen socks and snow boots to keep them warm. The chemical heating pads can save the day.
2. There are a few photographers who will get fish to feed the eagles. This benefits everybody. Think about contributing few dollars to the person supplying the fish.
3. Keep extra batteries in your coat pocket. The camera batteries can drain quickly in this cold weather.
4. I have my long lens( 600, 500 or 400) on a tripod and a medium telephoto lens( 200, 300 or 400) around by shoulder. The medium telephoto is useful for eagles flying overhead and when they fish closer to the platform.
5. Get the exposure right. It can be challenging to get the feather details properly exposed without over exposing the white head. A little bit of over exposure in the whites can be recovered in software especially if you shoot raw. Recovering under exposed shadow areas can result in noise. Histogram in the LCD screen is your friend. I have my camera LCD set to showing the blinkies. ( over exposed area start blinking). Adjust the exposure so your histogram is all the way to the right without going over. Since lighting conditions can change quickly you need to keep an eye on the histogram from time to time. If you are new to photography, I would recommend using aperture priority. Many experience photographers like the manual setting. They meter neutral target( something grey or green) and adjust the exposure off of that.
When the conditions are cloudy with diffuse lighting I tend to add + exposure compensation. This can go as high as +1. When it is sunny I tend to keep zero or even – compensation. This varies between different brands of cameras or different camera models of the same brand.
6. Maintained at least a minimum sutter speed of 1/1000 second to freeze the action. Higher is better. 1/800 will give you blurry wing tips which conveys a sense of motion. If the light is good I try to crank up my aperture to 7.1 or 8 get more depth of focus.
7.Lately I have been using Auto ISO in my camera successfully. It takes lots of the guess-work out of the equation. I set my d800 and d3 cameras as follows. Go to menu and turn on auto iso . In aperture priority mode you select the aperture you want and the minimum shutter speed. The iso changes when the correct exposure cannot be maintained by the given aperture. In manual setting (M mode) the iso changes if the shutter speed and the aperture you selected won’t achieve the desired exposure. In shutter priority( S mode) you set the minimum shutter speed and the camera changes the aperture and the iso to maintain that shutter speed.
I recommend following auto iso settings to start with.
Aperture priority, Aperture 5.6( if light is good I will go as high as 8 and if light is bad go wide open), iso range 100-1000, minimum shutter speed of 1000 (but I will dial this up to 1250 or 1600 if the light is good)
8. These are my Nikon D800 AF settings for eagle photography.
AF-on button activate the AF.(a4)
Drive mode set to CH(high)
AF-C and Af points to D-9
a1 – Release
a3 – Short to Normal
a6 – on
a7 – 51
a8 – off
Metering- My default metering is matrix metering. I use this for 95% of the time and works well. Only instance when this may not work is when shooting in bright sunny days and the eagle is backlit. In those instances I use center weighted matrix metering.
9.. Flash with a flash extender can be useful but I rarely use it.
10. Take care of your equipment. The platform is full people from fisherman lugging their gear to kids running around . They can easily bump into your gear and topple them. Worse the gear can go overboard. I witnessed a Nikon 600mm lens and a D800($15000) fall into Mississippi river just last week.
11. Bring a snack
Botswana 2012 Trip summery
Pied kingfisher, Chobe River.
Please read the earlier post that describes the preparation for the trip and the equipment list.
Equipment
We had five in our group. Three were shooting nikon and two had canons. All cameras worked without problems.
I used 200-400 with a 1.4 TC 80% of the time. D3 and 70-200 was used 15%. 24-70 was used seldom for landscapes. I did not miss my 600VR. I really like the zoom feature of the 200-400.
I also enjoyed the nikon v1 with the 10-30 lens as a point and shoot camera. Obviously it was more than PS camera. V1 was attached to my long lens with the adaptor when my lens on the DSLR was not long enough. The quality of the images were quite good. When there was action I gave the V1 to my driver to video tape the scene.
All of the places had vehicles that were not ideal for the use of bean bags. We modified the vehicles by tying two poles to each side of the vehicle so we can place the bean bags over them. This worked great. The molar bags fitted the poles better than the kinesis bags. Julie used her puffin pad from the vehicle and she liked it. She never used her super clamps that she brought. I would recommend carrying bungee cords to secure the bean bags and the camera bags to prevent them from flying off the vehicles. Tripod was used few times for the sunset pictures.
Gura gear kibuku bag worked well. It carried all my gear both in the plane and the safari vehicle. In the safari vehicle I looped a bungee cord around the side handle and secured it to the seat. I wished it had a laptop compartment so I didn’t have to bring a separate laptop bag.
My fear about carrying heavy hand luggage in Air Botswana flight was unfounded. They never checked the weight of the hand luggage. It weighed twice the allowed weight.
iPad used for reading and I wrote this blog post using WordPress app. All the camera manuals were stored in the iPad for easy reference.
My hyperdrive storage device malfunctioned. It would only download part of the images from the Lexa 1000x card. I should have tested the combo before bringing on the trip. Also check your card reader to make sure it works with your cards. Bringing two card readers in case of failure. I used my laptop to make two copies of the images to the laptop hard drive and external passport drive. I shot nearly 250GB of images. This was partly due to large file sizes of D 800. I also brought enough CF cards in case my hard drive failed.
Wonpro Universal 5-Outlet Power Strip with Surge Protector that I brought was very helpful. Many of the places we stayed had only few outlets and finding outlets to charge all the gear was a challenge. I also used Botswana to USA converter to plug in my power cord to theirs.
Weather was very pleasant and the cloud formations were gorgeous. We had few rain showers but not enough to interfere with the game drives. The prices were 40% cheaper compared to peak season in July-September. The game viewing was excellent but we had to work hard to find the animals due to availability of the water.
I did not use my rain coat at all. All the vehicles had garbage bags to protect the gear and good quality parkas for the guests. Mosquito repellent was never used.
It is not a bad idea to take some rehydration electrolytes in case you develop diarrhea.
One of the other members of the trip Rich had this to say.
· Point and shoot camera is helpful, especially for grab shoots around camp
· Took more pictures than I thought I would – especially with the camera set on high-speed in case action happened. Important to be ready for action, so keep set on high-speed.
· Feet for big lens is helpful on bean bags (see Wimberley Module 1 – M-1 / pair of these mounted on each end of QR plate will help the lens be more stable)
· Small paper notebook or small recorder to get names correct. ( I used the voice recording function of D3 instead of a tape recorder.)
· Did not use 16-35 but 24-105 was very handy. Lens were 24-105, 70-300 and 500 with TCs.
· Wimberley head was overkill – did not use it enough to justify weight. Full sized ball head would have sufficed.
· Limit clothing. 5 changes of tee shirts, socks, underwear is sufficient with 3 changes of pants and long sleeve shirts (2 might work but extra just in case)
· Cap clip – hats are easily blown off in windy vehicles


